In case you were curious, the most popular offering (by far!) on my website is my monthly desktop calendars.

It started on a whim in 2015…

…and since then they have evolved along with my photography.
Making these calendars combines my love of playing with flowers and paper and my vintage treasures. So today I thought it might be fun to give you a peek behind the curtain (so to speak) and share my process for creating the flat-lay still life photo that serves as the base.
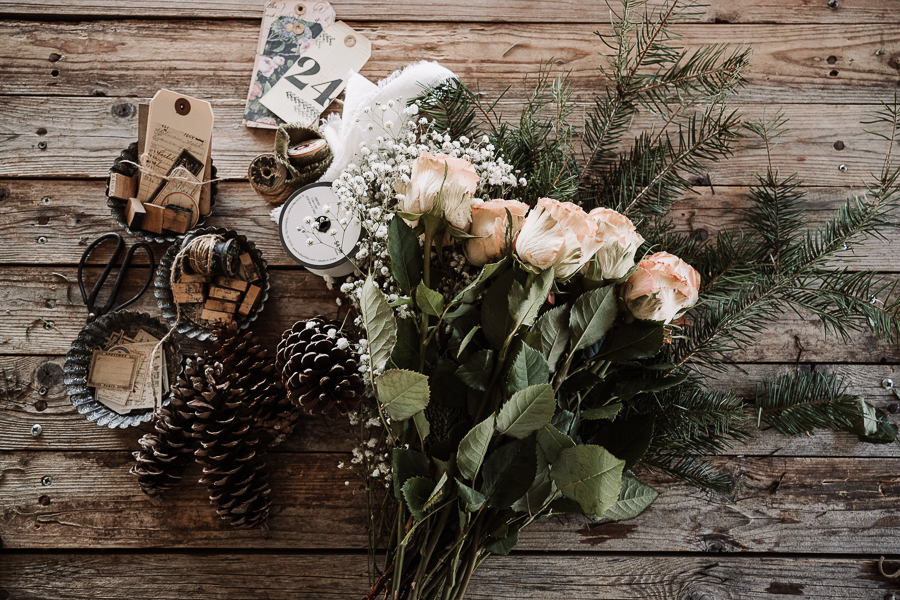
My process almost always start with flowers, and this time of year that means a trip to the grocery store. In this case it was a stop at Trader Joe’s where I found the prettiest pale coral garden roses. I paired those with a charming bunch of baby’s breath and some winter greens to add some more texture. I also grabbed a few pinecones from the big basket I keep in my studio and some of my favorite little vintage bits and bobs that make a regular appearance.
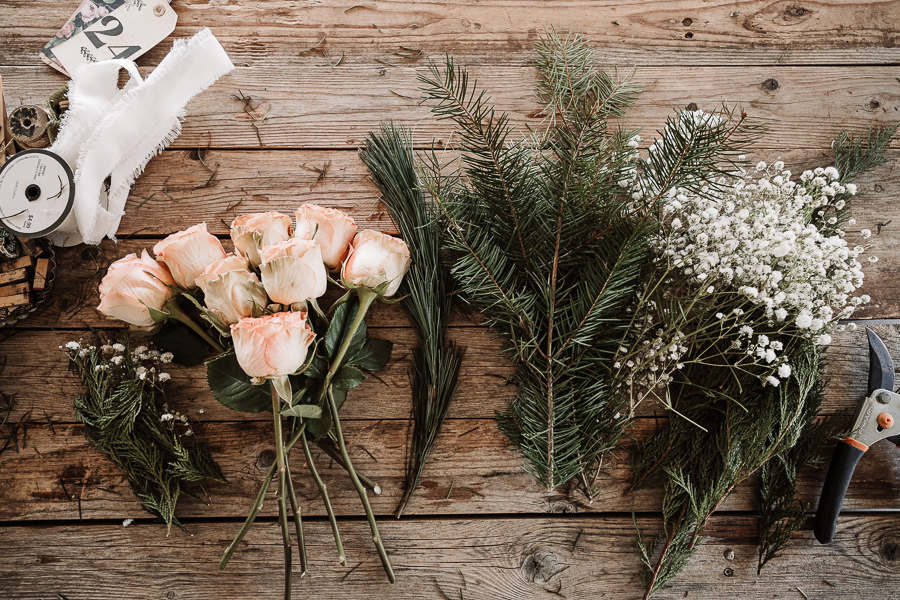
The first thing I do is trim the stems of my flowers and sort the individual types into little piles. Next I usually create a little mini-bouquet to serve as a kind of focal point in my still life.

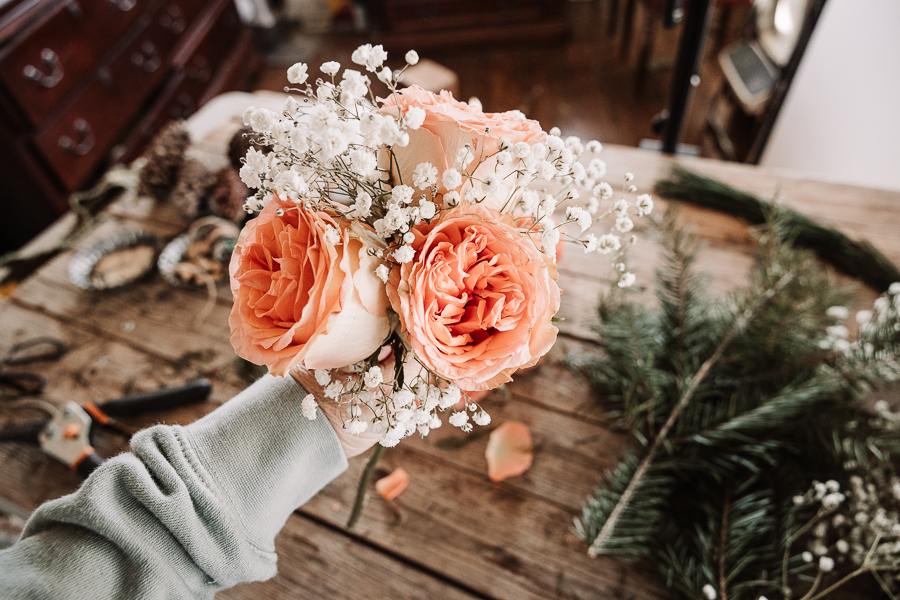

These blooms were still tightly closed so I gently opened up the petals a bit.

I then tied my bouquet with some pretty velvet ribbon.

Next I scrounged around through my stash of stuff for little elements that would add some interest. I found these cute wooden clothes pins that I hadn’t used in a while and wrapped some ribbon around them.

My next step is to loosely arrange all of my elements on my backdrop (a board Tripp made for me out of some old wood fence planks.)
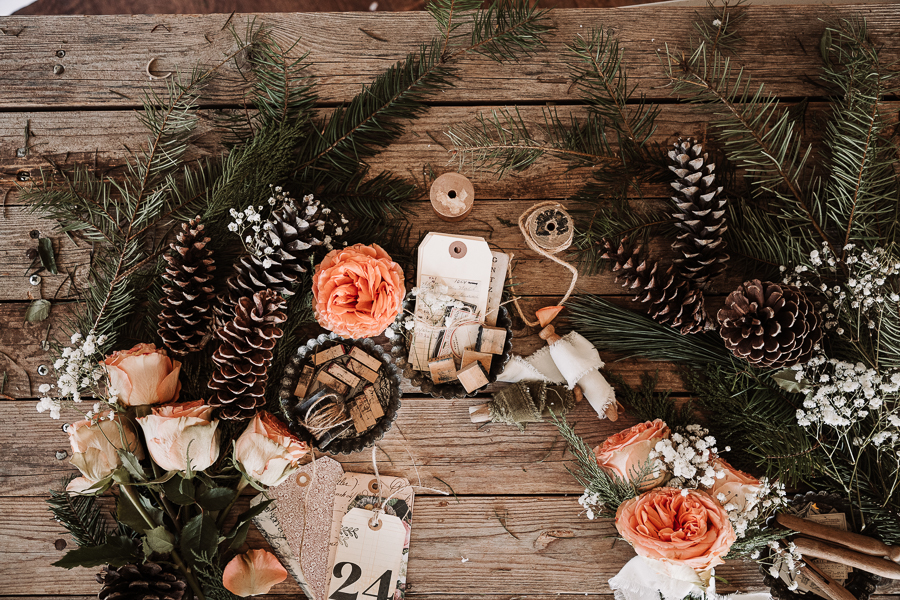
I then played around with the composition until it looked right to me.

I really don’t have a good explanation for what “looked right” looks like except that it has a loose visual triangle of the main elements and feels balanced.

Also, don’t worry if your space looks like this when you’re done…
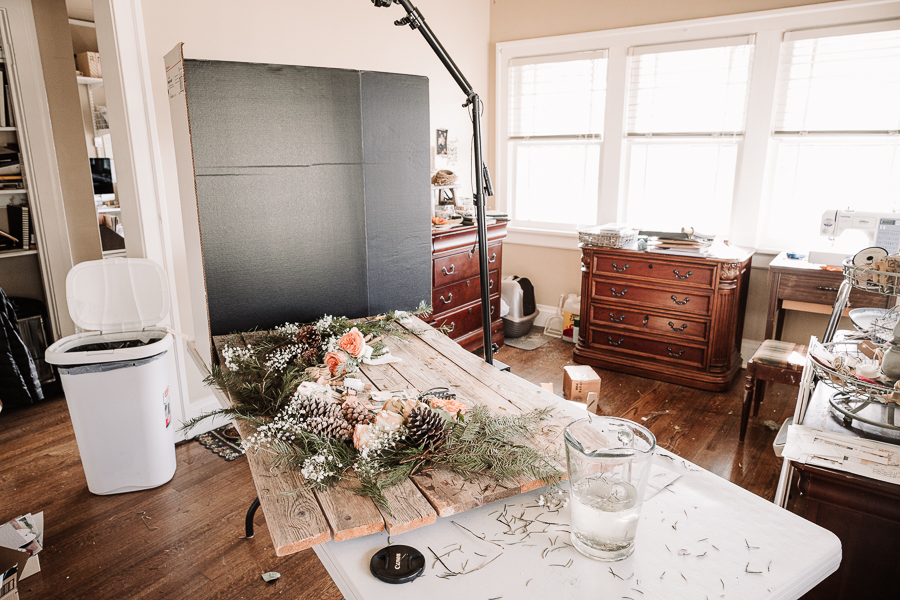
…that just means you’re doing it right. lol
Anyway, once I was pleased with the composition, I loaded my photos into Lightroom and applied my post-processing. If you are interested in seeing how I edited my photo, I have shared that process on my YouTube channel.
I hope you enjoyed a behind the scenes look at how I create my desktop calendars. They are a joy to make and it always makes my heart so happy to know how much you enjoy them.
Love, Kelly
Leave a Reply